Table of Contents
Particle Editor Section – UI Details
Before moving to the light editor section let’s go through the particle section UI in more detail, explaining the various parameters and so on. Much of this is actually also available as in the in-editor tutorial, you access it by pressing the hat icon in the top right corner of Eden, just left of the close Eden (X) button.
There you will find the tutorials section for Emitter 3Ditor.
Prefs
Let’s look at Prefs (Preferences) first before we go any further.

- Always start with Eden:
If you check this box the tool will automatically open with Eden.
If you leave this unchecked you will have to start the tool from Tools → h- → Emitter 3Ditor (or using the shortcut CTRL + ALT + E) each time.
Not checked by default.
The Tool list allows you you to select which tool section to start into with Eden, particle editor or light editor. This is disabled if Always start with Eden is unchecked.
- Always start hidden:
Another setting depending on if Always start with Eden is checked or not.
Checking this box means that when this tool starts with Eden it will not be visible but it is running so inserting emitters is possible etc. You can reveal the tool by pressing CTRL + BACKSPACE.
Not checked by default.
- Show emitter names in 3D/map:
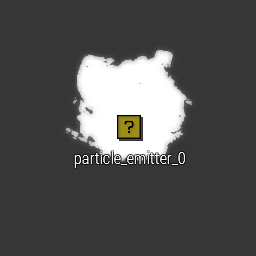
When you insert emitter(s) they will get a default name which is shown below the emitter in both the 3D edit area and on the map. Unchecking this box will disable the names from showing.
Checked by default.
- Auto-change tool section:
When this is checked the tool section will change automatically to particle editor or light editor when selecting an emitter depending on the type of the emitter.
So select a light emitter and the tool will change to light editor, select particle emitter and it will change automatically to particle editor.
Not checked by default.
- Toggle default emitter set:
This enabled/disables the use of the default emitter set (mentioned and used in the examples, so read those first). When this box is checked the default emitter set will be inserted with SHIFT + INSERT.
To define the default set to something else than the “factory” set check this box and press the button Build Default Set.
- Always insert defaults:
A bit badly named but normally pressing INSERT will insert a single emitter. If this box is checked no matter if you press INSERT or SHIFT + INSERT the default set will be inserted instead of a single emitter.
- Build default set:
Pressing this button will open a new “sub-leaf” in which you can define the default emitter set. The details on this will be covered in a separate section of this wiki.


- Emitters editable for Zeus:
For toggling emitters as editable objects for Zeus globally.
As in if this is enabled by default all emitters, objects with “attribute emitters” and objects which have emitters attached to them will be editable by Zeus. Emitters and “attribute emitters” can be individually enabled/disabled when this is checked.
If Zeus not used this can be unchecked which can have some minor init performance increase in MP because a few less functions get defined.
- Show emitter names for Zeus:
Quite self-explanatory, when this is checked the emitter names will be shown for Zeus in Zeus interface like they are shown in Eden. Can also be toggled while in Zeus Interface (ALT + N).
- Disable data validation:
Checking this box disables the data validation from the UI parameter fields that use it.
Data validation makes things a bit slow so made it optional. When checking this box you will (always) get a confirmation prompt to make you extra sure.
NOTE that when data validation is disabled you have to press enter after entering the data into the param field for it to get updated “into” the emitter. Otherwise it does nothing.
USE AT YOUR OWN RISK!
IF YOU ENTER FAULTY DATA YOU MAY CORRUPT THE TOOL’S DATABASES AND FUP YOUR SCENARIO.
- Data Validation Timer Coef:
With this you can adjust the time it takes for the above mentioned data validation to kick in on any given parameter field. The value you can enter is from 1 to 10. This is available so that you can adjust the delay to your liking.
Note that the value entered is not the actual time in seconds but a coef value for internal “formula”.
- Disable Surface Snap 'slavery':
Disables the tool feature of while dragging emitter(s) with Eden Surface Snapping is on the emitter(s) will attempt to follow object (and water) surfaces. This is a bit “jumpy”, and may also cause FPS issues (in Eden) so can be turned off if so desired.
Does not affect the position fine tuning with Global attached emitters, that is still controlled by Surface Snapping.
- Disable hide with Eden:
Disables hiding the tool UI with Eden UI when hiding it by pressing BACKSPACE.
- Auto-hide tool:
Enables “Eden auto-dodging” feature.
Meant for using when the tool UI is obstructing Eden side panels (which happens on some resolutions/UI scales). When enabled the tool UI will automatically fade out when you move the mouse cursor to either Eden side panel area. Fades back in when you move the cursor out of the side panel areas.
To access the tool UI that is overlapping the side panel press and hold down CTRL on your keyboard and it will disable the “auto-dodging” until you release it.
- Always export as Cfg:
When this is checked the Export button in the Export leafs will always export emitter parameters in config format.
- Defaults:
Pressing this button will reset the preferences to “factory defaults”, including the default emitter set.
- OK pop-ups:
Pressing this button will reset all the Don’t show this message again boxes on all tool error/notification pop-up windows (such as the damage warning covered in Attribute Emitters) so that they all will show up again.
- Revert:
This is a Hail-Mary pass in case some sort of error occurs that corrupts the tool’s database.
Pressing this button will wipe everything edited with this tool from the scenario which should save the scenario from doom. This situation is covered later in more detail.
Basic Params
For the purposes of explaining the data you see on the tool UI, insert a single emitter and select MediumDestructionFire from the Emitter Class list. The Basic Params leaf should look like this (and flames should be emitting from the emitter):

Sprite, nTieth, FSIndex, Loop and Count:
Sprite is particle model that is used for the given particle class/effect. This also determines the texture used for the particle. nTieth, FSIndex, Loop and Count are tied with the sprite so they need to be explained as a whole here.
This is quite convoluted for the end-user: The particle texture is usually made out of small images in a row for several rows, in case of flame or explosion for example the images are basically stills of a single flame in different phases of it’s “life”. The Biki calls this “animation” meaning the animation of the particle effect. So think of a flame or explosion as an old school step animation. I will be referring to animation during the rest of this wiki so it means this.
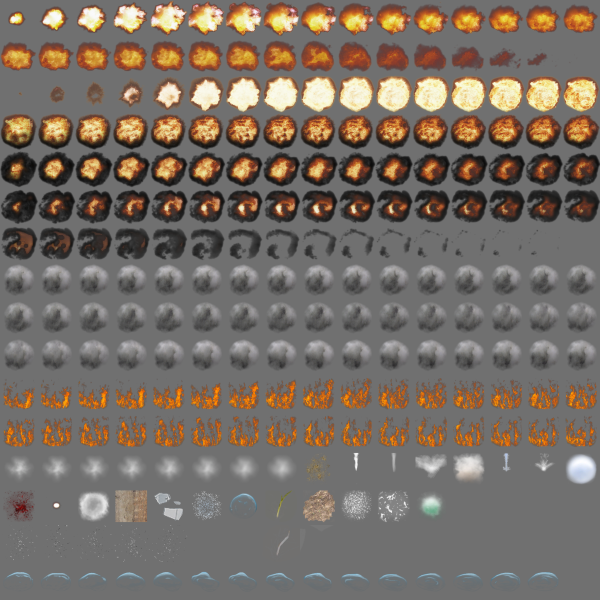
In case of the MediumDestructionFire the effect uses the sprite called “Universal”. And it uses a texture called “universal”. Note that sometimes the name of the texture is nowhere near what the sprite name is, many of them use the same texture.
The texture “universal” looks like this:
nTieth doesn't say much. According to the Biki, the value is a coefficient of the texture size (in pixels): 2048/coef. Which still doesn’t say that much (I guess it tells the game the row height is 2048/XX pixels).
In case of “universal” the “coef” is 16, which comes from the fact that the texture is comprised of 16 frames horizontal and 16 frames vertical. This can differ between different particle sprites so basically to know what divisor to use here you have to know which texture the effect is using and how and where to find it (vanilla ones reside at \A3\data_f\particleeffects\). To know which sprite model uses which texture you have to be able to open the sprite p3d model somewhere and check what texture is applied to it.. Really really user friendly stuff this, especially since the models are binarized, meaning it’s not too simple to get them open.
However, this tool provides functionality to check the vanilla particle effect’s textures: select a sprite from the list and press CTRL + ALT + WINDOWSKEY and if the sprite has an actual texture it is shown (some sprites use procedural textures instead). To close the preview press SHIFT + ALT + WINDOWSKEY, or ESC.
FSIndex means the index (or number) of the vertical row of frames. The index number starts from 0 (zero) like with arrays, so 0 is the topmost row, 1 is the next down etc.
Count means the amount of frames to play starting from the given row of frames defined with FSIndex. In case of MediumDestructionFire the count is 32, which is two full rows, and as you can see in the image below, starting from row 10 all the next 32 frames are all of the same flame.
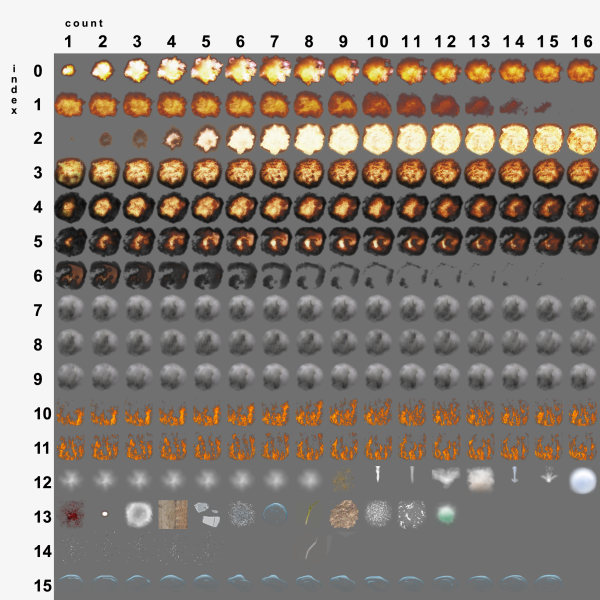
Loop means that the animation will loop, as in if the particle is still alive and the 32 frames is reached it will start over and will keep playing though the 32 frames until the particle dies. When the box is checked the animation will loop.


- Type:
What kind of particle to use, either Billboard (2D) what’s used for most particle effects, or Space Object which is a 3D particle, used to create things like flies and such.
Note that some later parameters, namely the rotation related ones behave a bit differently with each type, obviously 3D particle is able to rotate in 3D and 2D is not.
- TimerPeriod:
Interval in which the onTimer event (explained later) is called. Time in seconds.
Data type is number.
- Lifetime:
The time in seconds the particle will be ‘alive’.
Data type is number.
- Position:
3D position relative to the object the emitter is attached to. When not attached to anything shows the relative position to the emitter itself ([0, 0, 0]).
When emitter is not attached to anything (excluding Global attach) changing the values equals to dragging the emitter(s) around with the moue or changing height pos with Translation widget.
Data type is array (of numbers).
- MoveVelocity:
Velocity vector for the particle, [x, y, z]. As in direction of movement in 3D space.
Data type is array (of numbers).
- RotationVelocity:
A float number, how many rotations particle spins per second.
Data type is number.
- Rand. Direction Intensity:
Info on this is a bit vague but appears to be a value which is added to each move velocity vector element. It's a value randomly picked between 0 and the value shown.
Data type is number.
- Rand. Direction Period:
Interval (in seconds) in which the random Direction Intensity change of the move velocity vector happens.
Data type is number.
- Weight:
Mass of the particle, in kilograms. Affects how the emitter interacts with the surrounding air.
Data type is number.
- Volume:
Volume of the particle, in cubic meters (m^3). Affects how the emitter interacts with the surrounding air.
Data type is number.
- Friction:
Determines how much air friction the particle has, the higher the value the more friction and thus the harder for the particle to travel through air.
Affects the speed of the particle.
This also determines how wind affects the particles movement (the more friction the more the wind can “grab” the particle). 0 friction means the particle travels through the air without any friction, as if in vacuum.
Data type is number.
- onTimer Script:
A script file/path to a script file to run on onTimer event, interval determined by TimerPeriod. The particle's position is passed into the executed script, can be obtained with _this.
Data type is string.
- beforeDestroy Script:
A script file/path to a script file to run just before the particle dies. The particle's position is passed into the executed script, can be obtained with _this.
Data type is string.
- AttachedTo:
Shows the entity on which the emitter is attached to. Can not be modified. NOTE that if an entity is present in this field the Position parameter is relative to the attached entity's position.
Selection is a child of the AttachedTo property, shows the model selection on which the emitter is attached to, if any.
- Angle:
Determines the starting angle of the particle. Data type is number.
When using a spaceobject type particle angle changes into direction vector, datatype array (of numbers).
- onSurface:
Placing of particle on (water) surface on start of it's existence, default value is true, works only if circleRadius > 0 (circleRadius is defined in the leaf Circle). Data type is number.
- bounceOnSurface:
According to the Biki this is a speed loss coefficient when particle collides with the ground. Collision value can be between 0 and 1, -1 to disable collision. Collision disabled by default. Is apparently very performance hungry so should be used with care.
Data type is number.
- Drop interval:
The interval in which a new particle is emitted from the emitter. Time in seconds. Data type is number.
Render Params

This also works in lieu of the animation discussed in Basic Params.
The animation is also affected by the lifetime of the particle, so when dealing with the animation all the following parameters play together: Sprite, nTieth, Index, Count, Loop, Lifetime, Scale and Anim Speed.
If the particle lifetime is longer than the animation and the animation is not looped the last frame of the animation is shown until the particle dies.
- Frame nr.:
The frame count of the animation. First frame is number 0 (zero), second frame is 1 and so on.
NOTE that the parameters you see are individual parameters for each frame.
Scroll through frames with the arrow < > buttons, add or remove frames with the + and - buttons.
NOTE that a new frame is always added as the last frame of the frame list and when removing frames it removes the last frame on the list.
- Scale:
Size of the particle in the given frame. Size is in meters. Data type is number.
- Anim speed:
How fast the frame is “passed through”; according to the BIKI “number of animation cycles in 1s”. So speed is kinda the FPS for the animation. The higher the value the faster the speed of course. Data type is number.
Color and Emissive Color:
Self-explanatory I guess. Color gives a color to the particle on given frame. Emissive Color is used to 'light' up the particles so that they glow in the dark. The glow color is of course defined with the Emissive Color property.Which color is being displayed and edited with the sliders is selected by checking the box next to Color or Emissive Color.
The resulting color array is shown under the respective colors.
The sliders are what they say they are. R = red, G = green, B = blue and A = alpha (transparency)The color preview shows the color, not 100% 1:1 with actual color of the particle as Alpha has no effect to this preview..
Luminance:
Switches the alpha channel slider (A) between alpha and luminance.
Luminance determines how visible the particle is in Night Vision and Thermal Imaging.
This is the MediumdestructionFire in Thermals with 0 luminance, then with a little bit of luminance (-0.111299) and full luminance:
Alpha of course means transparency, the lower the value the more transparent the particle is.
On particles a negative value as alpha translates to particle luminance value, the lower the number the higher the luminance.In NV the effect is really subtle though, depending on the color of the particle (lighter particle shows this effect a little better). The range of the slider is from -0.1 to -10, beyond that there seems to be no visual difference. This depends on the particle.
So, when this box is checked changing the alpha slider value changes the luminance of the particle and vice versa. It's either or, can't be both at the same time.


Color preset:
Has some “factory presets” for colors, selecting one will “insert” that color for the given frame (changes the color sliders etc). You can also save and delete your own color presets.
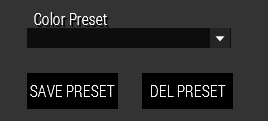
Deleting a preset is done by selecting the preset from the list and pressing Delete. “Factory presets” can not be deleted.
Saving a preset is simple, just use the sliders to doctor yourself a color and press Save Preset button. It will open a new sub leaf where you can (must) give a name for your preset.

Pressing Save saves the preset, Back returns you to the main Render Params leaf.
NOTE that names can only include English alphabet letters, no number as first letter of the name and only one kind of special character, underscore, is allowed.
Keyboard shortcuts:
ENTER = Save
ESC = Back


Random

Here you can randomize some of the parameters applied in Basic Params and Render Params.
These are parameters you would apply to a particle emitter with the setParticleRandom scripting command.
- Lifetime:
An interpolation between the lifetime value in Basic Params and this.
In other words the lifetime of the emitted single particle is randomized between basic lifetime and this random lifetime.
Data type is number.
- Position:
Works the same as above lifetime, a randomized position between the Basic Params position and this.
Each vector element is randomized individually.
Data type is array (of numbers).
- Move velocity:
Randomized move velocity vector between Basic Params move velocity and this.
Each vector element is randomized individually.
Data type is array.
- Rotation Velocity:
Rotation speed randomizer value, randomized between the Basic Params rotation velocity and this.
Each vector element is randomized individually. Data type is number.
- Scale:
Randomizer for the particle size defined in Render Params leaf.
Random value between the latter and this. Data type is number.
- Rand. Direction Intensity:
Randomizer value for the Basic Params Rand. Direction Intensity.
Interpolates a random value between it and this. Data type is number.
- Rand. Direction Period:
Interval (in seconds) in which the above Rand. Direction Intensity is applied.
Value is a random value interpolated between the Basic Params Rand. Direction Period and this.
Data type is number.
- Angle:
Randomizer for the Basic Params angle.
Interpolates a random value between the it and this. When using angle vector functionality is unknown, presumably interpolates each vector element individually.
Data type is number.
- Color:
Randomizer for the color set in Render Params. Randomizes each frame color setting individually.
Luminance is the same as the luminance switch in the Render Params leaf, switches the alpha slider between alpha and luminance.
- BounceOnSurface:
Randomizer value for the Basic Params bounceOnSurface.
Interpolates a random value between it and this. Data type is number.
Circle

Parameters you would apply to a particle emitter with the setParticleCircle scripting command.
- Radius:
The radius of the circle created on the emitter position, in meters. The circle center is the emitter position.
Data type is number.
- Velocity:
Velocity vector along the circle disc defined with Radius.
Velocity is transformed (I guess vector magnitude is calculated) and added to total velocity determined by move velocity in Basic Params and Random.
Data type is array (of numbers).
Damage

Parameters which you would apply to particles with the setParticleFire scripting command.
- Damage type:
Type of damage to inflict, Fire is only one available though.
- Core intensity:
Damage intensity in emitter center (position). Seems to be some sort of coefficient of some value determined in the damage type somewhere in the bowels of the game engine.
Data type is number.
- Core Distance:
Distance from the emitter center to receive the damage defined by Core intensity. In meters. Data type is number.
- Damage Time:
Interval to inflict the damage in. 1 means once a second, 0.5 two times a second, and so on. Data type is number.
Special

Perhaps a bit dumb name for this leaf but whatever, this houses a few special attributes.
- Die out:
Same as with the Attribute Emitters, this is a timer in seconds, after which the given emitter (or emitter set) will be deleted.
The time starts from the moment the emitter starts emitting. The deleting will be instant, the emitter will NOT wind down gradually.
Data type is number.
- Follow objectHide:
This is the same as with the Attribute Emitters. Will make the emitter(s) follow the objectHide “status” of the object (hidden or not with obj objectHide true/false) the emitter is be attached to (if any).
Made optional because starts a looping script on each object this is used with.
Import modules:
If the scenario in question has BI Particle effect module(s), this button becomes active.
By pressing this button you can import the module(s) into the tool. Note that the module is deleted from the scenario once it has been imported. The module is replaced with an emitter.
You can then edit those emitters the same way you can edit the emitters placed with INSERT.Related to this, if this tool is running and you load a scenario into the editor which has the BI particle effect module(s) present the tool will ask whether you want to import them. More on this covered in Particle Editor Section -> Examples -> Import Module
- Enable for Zeus:
Toggle selected emitter/emitter set as editable by Zeus. When enabled will show up for all Zeus’ in the scenario as editable object. See more details on dedicated section Zeus Interaction.
- Only for Zeus:
Limit the selected emitter/emitter set as editable to only the given Zeus, or given multiple Zeus'. Enter the variable name of the Zeus module(s) here. If multiple Zeus' used separate names with a semicolon (no spaces!!), like: Zeus1;Zeus2;Zeus3
See more details on dedicated section Zeus Interaction.
- Particles:
Available only when running the diagnostic exe of the game. On/off switch for the “Particles” diag_enable.
- Particle Names:
Available only when running the diagnostic exe. On/off switch for the “ParticleNames” diag_enable.
Export/Import

Export is here if for some reason need to cook up parameters and paste them into a script instead of just placing them with this tool into the scenario. It’s is possible if you need to have the emitters do something specific with an object other than just stay on it.
To export in config/description.ext format press and hold down CTRL on your keyboard when pressing the Export button.
Import stands for “pasting” parameters from a script “into” the emitter placed with this tool.
In here you can also save and load your own parameter presets.
- Clear:
Pressing this button will clear all data from the export fields.
Export Sqf/Cfg:
Pressing this button will export the parameters shown on the “export data fields” onto the clipboard for pasting into a separate script/text file. The parameters are pasted exactly as they’re shown on the fields. By default exports in sqf format, by holding down CTRL while pressing this button will export in config format.
Export current only checkbox:
If this is checked the export button will export only the parameters shown on the fields, if it is unchecked export will export parameters for all emitters in the scenario.
Exclude light emitters means that if checked and you are exporting a set of emitters which includes a light emitter its parameters won’t get exported, as in export particle parameters only.The horizontal list of particles below the “export fields” relates also to the emitter sets. It lists the emitters in the selected emitter set.
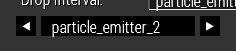
With this list you can scroll through the individual emitters in the given set, the “export fields” showing the currently shown emitter’s parameters.Lock export fields disables the “auto-filling” of the export fields when selecting emitters. Handy if you wish to “paste” parameters into several different emitters/emitter sets for example. Or are just annoyed by the auto-filling..

- Paste Params:
If you have some favorite particle params in some scripts of yours you can use this to “import” them into the emitters placed via this tool.
Just copy/paste the appropriate params to their places on the “export fields”, place down a particle emitter and press Paste Params. The emitter should receive these params and start emitting according to them.
You can then edit them further with this tool if you wish.
NOTE that obviously the parameters have to be valid, no expressions of any kind are supported.
- Save Preset:
Pressing this opens a separate sub leaf in which you can save the current selected emitter/emitter set as a preset.

Name is required, description is optional. Description is useful to for example noting how many emitters a set of emitters needs if the preset is saved as a set. The description will be shown as tool tip when hovering over the preset name in the Load Preset dialog.
Save set as preset does what it says, if you want to save the whole emitter set (if one is selected) as a preset check this box.
NOTE that when saving sets as presets importing them requires equal amount and equal types of emitters placed as a set in the same exact order as the saved preset set was.
NOTE that when loading a single emitter preset you can only load particle presets “into” a particle emitter.Keyboard shortcuts:
ENTER = Save
ESC = Back

Load Preset:
Opens up a separate sub leaf for “loading” particle presets into emitters.

Presets which are emitter sets are in red color so as explained above they will need the same amount of emitters and same exact types in the same exact order in a set to load into.
So let’s say the set you save as a preset has two particle emitters and a light emitter; particle_1 – particle_2 – light_3.
To load that preset into a set the set must consist of particle emitter – particle emitter – light emitter.You can also delete unwanted presets here, just select the preset you want to remove and press Delete.
Keyboard shortcuts:
ENTER = Load
ESC = Back
DELETE = Delete
