
—-
Sidebar
led_ui
Table of Contents
Light Editor Section – UI Details
Let’s go through the Light editor section GUI in more detail, explaining the various parameters and so on.
Much of this is actually also available as in the in-editor tutorial, you access it by pressing the hat icon in the top right corner of Eden, just left of the close Eden (X) button.
There you will find the tutorials section for Emitter 3Ditor.
Light Params

This is where all the light parameters can be applied, which you would in scripting add with all the setLightXXXXX commands.
- Color:
Defines the light source color. Color is in format RGB.
The color output is shown the edit box, you can also copy/paste color array into it and it will be applied to the emitter. Just make sure it is the correct format.
- Ambient:
Ambient color. If this is defined this color is used to illuminate the surfaces surrounding the light source, including surfaces that are not facing the light source. Ambient color is format RGB.
The color output is shown the edit box, you can also copy/paste color array into it and it will be applied to the emitter. Just make sure it is the correct format.
- Link ambient with color:
Tool specific feature, checking this box will make the Ambient sliders follow the Color sliders.
- Type:
Since game version 2.06 directional lights (“#lightreflector”) are supported. With this you can select which type of light you want to create, point or directional.
Directional lights have their own settings in the Directional leaf.
- Intensity:
Light’s intensity, or brightness. The higher the value the brighter the light.
- Attenuation:
Light intensity drop-off over distance. Standard method of attenuation (1 / (constant + linear * dist + quadratic * dist * dist)). Start param means the distance (in meters) after which the attenuation starts to take effect (dist = distance – start). Unless you are familiar with whatever these calcs are based (and I am not) I’d say just see what happens when playing with the numbers.
- Start: Distance from the light after which the light attenuation starts. In meters.
- Constant: Constant attenuation coef (1 / (constant + linear * dist + quadratic * dist * dist))
- Linear: Linear attenuation coef (1 / (constant + linear * dist + quadratic * dist * dist))
- Quadratic: Quadratic attenuation coef (1 / (constant + linear * dist + quadratic * dist * dist))
- Hardlimit start: Optional, max distance hard limit start (start of fading of intensity to 0), in meters
- Hardlimit end: Optional, max distance hard limit end (end of fading of intensity to 0) in meters
- Position:
3D position relative to the object the emitter is attached to. When not attached to anything shows the relative position to the emitter itself ([0, 0, 0]). When emitter is not attached to anything (excluding Global attach) changing the values equals to dragging the emitter(s) around with the mouse or changing height pos with the Eden Translation widget.
Data type is array (of numbers).
- Use flare:
Checking this will make the light use the flare effect (the bright “star” looking thing on the light).
Checked = show flare, not checked = no flare.
- Flare size:
Size (diameter) of the shown flare, in meters.
- Flare max distance:
Maximum distance at which the flare is visible, in meters.
- Visible in daylight:
Turns light’s visibility in daylight on/off. When checked daylight visibility is on, meaning that the light will illuminate even during daylight. Light has to be brighter than the current world lighting.
- Attached to:
Tool specific parameter, shows the entity on which the light is attached to, if any.
Selection is a child of Attached to, shows the model selection the light is attached to, if any.
- Light as IR:
Since game version 2.06 it is possible to create IR (Infra Red) lights. Visible only in Night Vision.
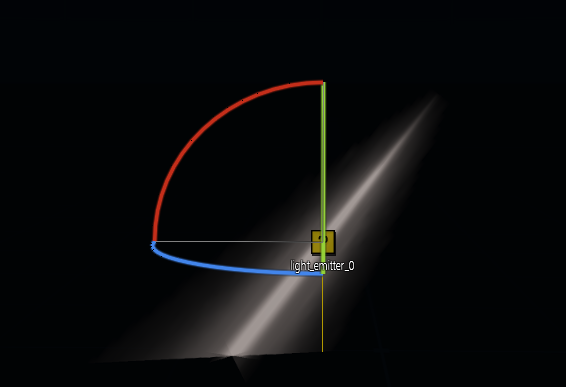
Directional

Since game version 2.06 it's possible to define directional lights.
In the Light Params leaf you can select whether the light emitter type is point or directional. Selecting directional allows to to use this Directional Leaf to set the “light cone” parameters.
At the time of writing this there's not much information available about these yet. So this may contain erroneous info..
You can rotate the light in 3D using the Eden Rotation Widget or in 2D by holding down SHIFT and dragging the direction arrow from the emitter (press and hold left mouse over the emitter and move the mouse, like with any Eden entity).
- Outer Angle:
Basically there are two “layers” of the light cone on top of each other, outer and inner. This defines the outer angle which is softer. If outer angle is smaller than inner angle the light cone has sharp edges and if the outer angle is larger than inner angle the edges are soft.
- Inner angle:
Same as above but for the inner angle value.
- Fade Coef:
Affects the outer angle only. Defines how fast the soft edges of the light fade out.
Volumetric shape:
Path to a model used for the “3D light cone” you can see for example on vehicle lights and such. The game comes with these shapes but for some reason they do not function correctly with this as they're basically inverted so the origin of the cone is away from the emitter towards where the emitted light is pointing, and the shape is pointing at the emitter. There is no information on how to make custom shapes yet.Here's for example is how using the “a3\data_f\VolumeLight_searchLight.p3d” looks like:
Note how the beam is coming from the sky towards the emitter although it should originate at the emitter and point to the sky.
However, for example “a3\data_f\VolumeLightFlashlight.p3d” works correctly, it's just really faint.
Here's a list of the vanilla shapes:- “a3\data_f\VolumeLight.p3d”
- “a3\data_f\VolumeLight_searchLight.p3d”
- “a3\data_f\VolumeLight_searchLightSmall.p3d”
- “a3\data_f\VolumeLightCar.p3d”
- “a3\data_f\VolumeLightFlashlight.p3d”

- Shape scale:
Size vector of the volumetric shape, not known if it's in meters or coef or what.
Note that when going too large with the size you will start hitting some model edges or something because the cone texture will cut-off abruptly.
Datatype is array (of numbers): [x, y, z]
Save Preset

For saving your light params as a preset.
Name is required of course, Description is optional. The description will be shown as a tool tip when hovering over the preset name in the Load preset dialog.
Pressing Save will save your preset.
NOTE that names can only include English alphabet letters, no number as first letter of the name and only one special character, underscore, is allowed.
NOTE that you can only load a light preset “into” a light emitter.
Keyboard shortcuts:
ENTER = Save
Load Preset

For loading presets you might have saved. Here you can also delete them if you want.
To load a preset, select a light emitter to load the preset “into”, select the preset from the list and press Load.
To delete a preset, select it from the list and press Delete.
Keyboard shortcuts:
ENTER = Load
DELETE = Delete
Special

This houses a few special attributes.
- Die out:
Same as with the Attribute emitters, this is a timer in seconds after which the given emitter (or emitter set) will be deleted.
The time starts from the moment the emitter starts emitting. The deleting will be instant, the emitter will not wind down gradually.
Data type is number.
- Follow objectHide:
This is the same as with the Attribute emitters. Will make the emitter(s) follow the objectHide “status” of the object (hidden or not with obj hideObject true/false) the emitter is be attached to (if any).
Made optional because starts a looping script on each object this is used with because there is no eventhandler for this.
- Enable for Zeus:
Toggle selected emitter/emitter set as editable by Zeus. When enabled will show up for all Zeus’ in the scenario as editable object. See more details in dedicated section Zeus Interaction.
- Only for Zeus:
Limit the selected emitter/emitter set as editable to only the given Zeus, or given multiple Zeus'. Enter the variable name of the Zeus module(s) here. If multiple Zeus' used separate names with a semicolon (no spaces!!), like: Zeus1;Zeus2;Zeus3
See more details in dedicated section Zeus Interaction.
Export/Import

Export is here if for some reason need to cook up parameters and paste them into a script instead of just placing them with this tool into the scenario. It’s is possible if you need to have the emitters do something specific with an object other than just stay on it.
To export in config format press and hold down CTRL on your keyboard when pressing the Export button.
The parameters can be selected from their individual fields, “export fields”.
Pressing Export copies the parameters into the clipboard and into the .rpt file.
Here you can also import light parameters from some script for example: Place down or select a light emitter, copy/paste the parameters from the script to their appropriate export fields on the tool UI and press the Paste params button.
- Clear:
Pressing this button will clear all data from the export fields.
- Export Sqf/Cfg:
Pressing this button will export the parameters shown in the “export data fields” into the .rpt file and into the clipboard for pasting into a separate script/text file. The parameters are pasted exactly as they’re shown on the fields. By default exports in sqf format, holding down CTRL while pressing this button will export in config format.
- Export current only checkbox:
If this is checked the export button will export only the parameters shown on the fields, if it is unchecked export will export parameters for all light emitters in the scenario.
- Lock export fields:
Disables the “auto-filling” of the export fields when selecting emitters. Handy if you wish to “paste” parameters to several different emitters/emitter sets for example. Or are just annoyed by the auto-filling..
- Paste Params:
If you have some favorite light params in some scripts of yours you can use this to “import” them into the emitters placed via this tool. Just copy/paste the appropriate params to their places on the “export fields”, place down a light emitter and press Paste Params. The emitter should receive these params and start emitting according to them. You can then edit them further with this tool if you wish.
led_ui.txt · Last modified: 2021/12/05 13:39 by hneg